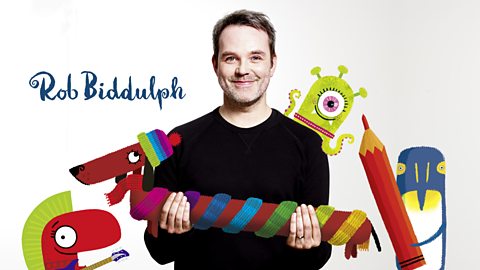
Who is Rob Biddulph?
Rob Biddulph is an author and artist and is the official illustrator for World Book Day. He has been busy making his 'Draw with Rob' series of videos to entertain kids and show that anyone can draw.
After sharing these five tips to help you confidently draw with your kids, he is here again with some step by step tips to help you and your child draw a festive favourite together.
Introduction to Rob Biddulph:
Hello, everyone. My name is Rob Biddulph, and I am a children's author and illustrator and you might also know me from my series of draw along videos under the name Draw With Rob. Now, I am here today to show you how to show your child, how to draw a very simple Christmas character. So, why don't you grab yourself a pencil, grab yourself a piece of paper and let's get started.
Get drawing!
"OK, so I am now going to show you how to draw a very simple Christmas tree character that you can show your children and the two of you can draw together. Now, the key, I think, when you're showing children how to draw something, quite often the children will look at a finished drawing and they'll think 'oh there is no way that I could ever do that,' so the key is to break it down into its component shapes. So break it down into little bite sized chunks. That each one of those bite sized chunks is very easy to do and if you do those one at a time, by the time the whole thing is done and you've put all those little bite sized chunks together you end up with a drawing that you will be very proud of your children will be very proud of too.So, the way that I do it is, I draw the shape on my video and the children, then, usually they pause the video and they copy what I do and then they'll start me up again, I'll draw a bit more, then they draw, I draw, they draw, I draw, they draw and then by the end, as I say, we end up with a nice drawing. So, you can do exactly the same thing in real life, not on video, you know, you draw a shape, pause, let them copy what you've done, then you draw the next bit, OK, so step-by-step, that is the key.
So, this is how we do our Christmas tree. We start towards the top of our page with a very simple horizontal line, about five centimetres long, like that. Then coming up from the end we're just going to draw a nice diagonal line that goes about half way along that horizontal line and then another one that joins up at the top. So, a very simple triangle shape. And our Christmas tree, we're just going to make it up of three of these triangle shapes that's sort of disappear into each, Okay.
So, the next one we're going to do, if you imagine we are going to do another triangle, but the point of the triangle would actually be about there, we are not going to draw that point, we are going to do it sort of hidden behind this first triangle that we've drawn. So, what I want you to do is another diagonal line, we'll try and keep it parallel to that one, but obviously it's gonna be about twice as long. Let's do the same here, about twice as long, and again we're joining them up with the horizontal line, and then we're going to do exactly the same thing one more time. So, another diagonal line parallel to the others, but a bit longer. Same on this side, and then let's join them up. So, three triangles that are kind of interlocking, basically, is the way to think of it.
And you might notice that my lines a bit wobbly, they're sort of thick and thin, they're not all uniform. They're not perfect by any means and I think this is another really important message to communicate to your children. We are not looking for perfection. In fact, I think when you have little imperfections or little mistakes, that's where the charm is in a drawing, you know, we don't want these to be too perfect. If we wanted it to be perfect, then we could just get a robot to draw it. That's what I always say, you know the charm of the drawing is in the little idiosyncrasies, so don't worry about it being perfect. Certainly, if a child makes a mistake, we don't want them screwing the paper up and starting again. We want to keep on drawing, that will just help build their confidence.
The next thing to do with our Christmas tree, we're gonna do two vertical lines quite close to each other coming down from the centre of that bottom triangle. And then we're going to draw a horizontal line going straight across the bottom of those vertical lines. Then from each end of the horizontal line, you're gonna draw two more lines. They're not quite vertical, can you see they very slightly taper. There they go in very slightly towards the bottom, like that. Then let's join them up with another horizontal line, like that. Now, we're going to add a couple of little bits of detail now. I think if you just have a couple of nice little bits of detail, that kind of elevates your drawing into something special, certainly in your child's eyes, and you know what? It's really easy to do in this instance, because what we're going to do, right in the middle of this, of this shape down here, which is obviously the pot that our Christmas tree is standing in, I just want you to draw a little circle, like that. And then we're going to draw two more triangles coming out of the sides of that circle. Just like that. And then behind those triangles, we're going to do, you have to imagine there's a horizontal line running all the way across, and look we've made a little bow going around the pot of our Christmas tree. So, a nice, simple little detail. And then, let's add a star to the top of a tree shall we? So, this is how we're gonna do it. We start right at the point of our tree, and let's draw two straight lines, like that. So, almost like an inverted V shape, quite shallow V shape. And we're going to come up there and another diagonal line, you go out there, a horizontal line. Imagine that line carrying on straight through. And then we're gonna do a mirror image on the other side, like that. So, a nice, simple star shape. Easy peasy. Now, I thought it would be fun to bring our Christmas tree to life add a little bit of magic to proceedings. Pretty easy to do. You can do this with any object you draw, actually, with your children. No matter what is, if you just add a pair of eyes, it makes that object come to life and your children will just love it, I promise you. So, what we are going to do, very simply, we are just gonna draw two little circles in that top triangle, one, two little circles. In each one we're going to draw a smaller circle, like that. And then each of those smaller circles, we're going do a really tiny circle and we are going to do that, sort of, up to one side, so this one is up to the top right. And then let's just colour in around that tiny circle, like that. And look, we have two little eyes, little points of light in the pupils. You know what? You can add little eyebrows above each one. And you know what? That's enough just to bring your Christmas tree creation to life. The last thing I'm going to show you, which is a good little trick, is that we're going to add a little bit of shadow to the bottom of our Christmas tree, the pot where it hits the floor, and this is another very easy, but very effective trick. All I want you to do is just add a little bit of scribble off to the side of the pot like that. And the same on the other side. Just a little bit of scribble, like that, and it makes it look like that pot is sitting on a surface and casting a little bit of shadow, and it's so easy, and so effective. Children are blown away by that when I show them that little trick.
Make it your own!
Now, it's always good to do a drawing that the children can then customise, and make their own. So, I want you to let them run free at this point, they can do anything they like with their Christmas tree. I'm going to just go into super speed mode now and do mine, colour it in and add a few decorations. You can either copy what I do, or I would say just add lots of baubles and tinsel. Do whatever you want and, let your imaginations run wild. So I'm going to go into super-speed mode in three, two, one, go! So there you go, there's our finished Christmas tree and, you know, you saw it as a relatively simple drawing, but once they've kind of customised it and put their own spin on it, it's going to be something that they to be very, very proud of, so you need to encourage them to sign their drawings and then get them up on the wall as soon as you can. So there you go, that was pretty simple, wasn't it? We've got a nice little Christmas tree character here. So, I hope you had fun learning how to do that and the brilliant thing about it is you can turn these drawings into Christmas cards, you could frame them up and give them as Christmas presents – I know lots of relatives and friends would love to have one of these as a Christmas present, you could even cut them out and hang them on the Christmas tree. So there's lots and lots of things that you can do with this, but the most important thing is that the two of you have fun together doing it. That really is the most important thing. So I really hope you do. OK, I am going to see you again very soon, in the meantime, have a very merry Christmas, everyone.
Thanks Rob! Happy drawing everyone.
You can find more inspiration on making art with your children with BBC Teach on this article here.

More from BBC Bitesize Parents' Toolkit…
Parents' Toolkit
Fun activities, real-life stories, wellbeing support and loads of helpful advice - we're here for you and your child.


Rob Biddulph's five tips to help you confidently draw with your kids
Rob Biddulph, author and official illustrator for World Book Day, has some great tips and tricks to share to help you draw with your kids.
Fun activities for smaller children
Four to five-year-olds can have fun and learn new skills with these videos. From Tiny Happy People.

Five multisensory activities you can do with your child at home
Dr Susie Nyman shares her top tips on multisensory activities that you can do around the house with your child.